I get a good amount of DM’s on how I edit and take my pictures so I thought I’d share with y’all how I usually edit a picture before posting it. Most of my shots are through iPhone, since the beginning of my blog and instgram (when I was about 12 or 13.) Starting with the iPhone4, 6, and I currently have an 8; but I do have the occasional DSLR posts.
Here’s the original shot I’ll be using for this tutorial. My favorite shots are usually done in natural lighting, preferably with the sun hitting me. Overcast skies make for good lighting too, even though it doesn’t make for the prettiest days it makes for good lighting since it’s not too harsh and leaves you with smoother looking skin.
Lately I’ve been using fore on random pictures to get that nice blurred background so that the focus is on my outfit and not my sureoundings, especially if your surroundings aren’t optimal. Shooting a good shot is often related to having a good location but through focusing on the subject the background becomes almost irrelevant. Side note fore is purposely used for this single effect and has about six different blur intensities. I started doing this after taking pictures on an iPhone 8 Plus where portrait mode has become my favorite! I only have an 8 which doesn’t have this feature. 😦 boooo apple. Which is why I had to use this app.
My go to step for most pictures is using Facetune to whiten either grey or white area in the picture with the whiten tool. I usually whiten the sky too because I prefer white over blue in my pictures. Doing this will also make your skin color pop in the picture. I only whiten it to where it looks somewhat natural. While in Facetune I also smooth my skin with the smooth tool because while being under direct sunlight will give you that tan glows goddess skin for the picture, it also allows for even the smallest bumps on your skin to be prevalent and often makes your skin look a bit harsh.
In Facetune I also take the sharpen tool and go over my glasses, hair, and eyes which is just a nit picky thing that a lot of people probably can’t tell the difference about but I’m keen on details and feel that doing just even a tad bit more can give your picture that HD camera look without having to shoot on a professional camera. Additionally outlining buttons on coats or seams is something I’d do. Since the shirt I’m wearing is heavily detailed I sharpened it as well which makes it look like it was shot on a high resolution camera.
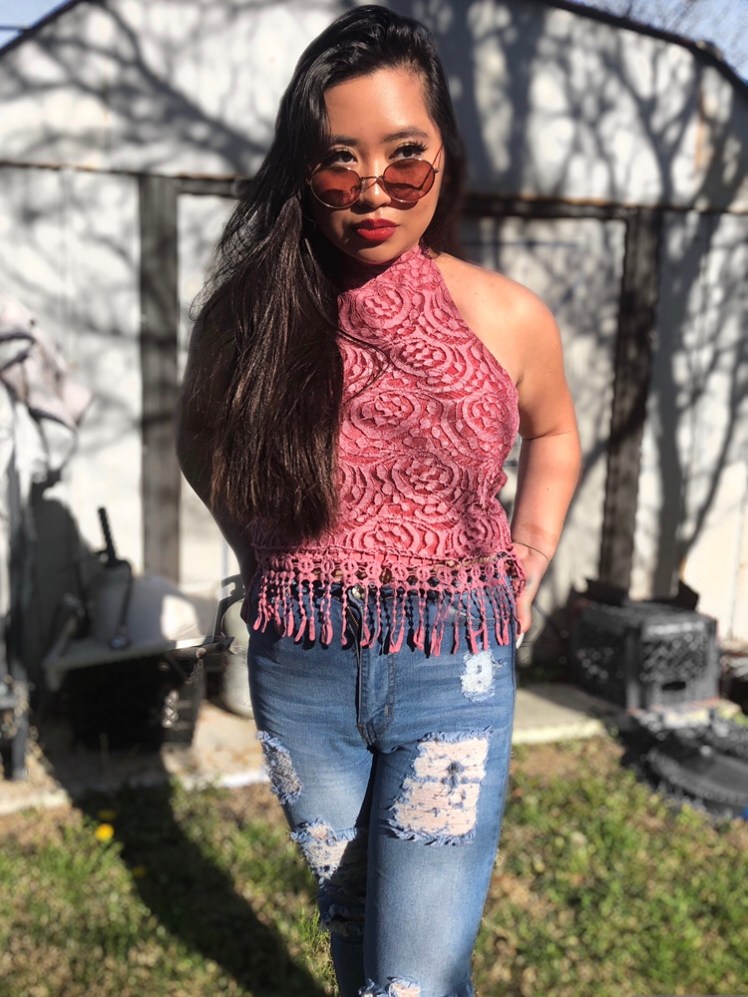
Another small step I like to do is making things that don’t belong less prevent. (Which can also be done in Facetune with the black and white tool.) For example the red crate bothered me and the red was a bit obnoxious so I used the black and white tool to fit the aesthetic I wanted. And I also cropped out the logo from the first step because well, that’s annoying.
AND,THAT’S ALL FOLKS. Of course you can go in with actual filters if you want to after, but I’ll save that for a later post. Pictures like this can do well off on their own by simply adjusting the shadowing/ contrast in which I usually like to decrease for a darker aura and maybe bringing up the brightness/highlight just a tad in order to bring out the whites in the picture.

Thanks for the advice. I’ve been looking out for a post like this!
LikeLike
Are all the apps free
LikeLike
Yes 100%!
LikeLike
Share more posts like this please
LikeLike